Boiling green beans is arguably one of the simplest and healthiest ways to prepare this beloved vegetable. Yet, achieving that perfect balance of crispness, tenderness, and vibrant color can sometimes feel like an elusive culinary secret. No more! This ultimate guide is designed to transform your green bean game, ensuring every bite is a delightful experience, whether you're working with fresh-from-the-garden bounty or convenient frozen bags.
Mastering the art of boiling green beans means they retain not just their gorgeous hue and satisfying texture, but also their valuable nutrients. We'll walk you through a detailed, step-by-step process, share expert tips, and address common pitfalls so you can confidently serve up impeccable green beans every time.
Why Master the Art of Boiled Green Beans?
Green beans are more than just a humble side dish; they're a nutritional powerhouse packed with vitamins (A, C, K), folate, and fiber. They're naturally low in calories and fat, making them an excellent addition to any healthy diet. But beyond their health benefits, perfectly boiled green beans offer a versatility that makes them a staple in countless kitchens.
Imagine crisp, bright green beans adding a refreshing crunch to a summer salad, serving as the star side dish alongside a roasted chicken, or providing a vibrant contrast in a hearty casserole. The difference between bland, mushy, dull green beans and those that are tender-crisp and bursting with natural flavor is immense. By learning the proper boiling technique, you unlock the full potential of this versatile vegetable, elevating everyday meals into something truly special. It's a fundamental cooking skill that empowers even beginner chefs to create impressive, healthy dishes.
Essential Tools & Ingredients for Success
Before you dive into the boiling process, gathering your tools and ingredients ensures a smooth and successful cooking experience. You won't need much, which is part of the beauty of this simple preparation method.
What You'll Need:
- Green Beans: Whether fresh or frozen, the quality of your beans sets the foundation.
- Fresh Green Beans: Generally yield the best results for texture and flavor. When selecting fresh beans, look for those with a bright green color and a firm, snappy texture. Avoid beans that are limp, bruised, or have visible blemishes. A good test is to snap a loose bean; it should break cleanly rather than bend. Thinner beans often tend to be sweeter and less fibrous.
- Frozen Green Beans: A fantastic, convenient alternative that boils up beautifully. No need to thaw them beforehand!
- Water: Plenty of it! This is crucial for even cooking.
- Salt: (Optional, but highly recommended) A simple addition that makes a huge difference in flavor and helps preserve color.
- Ice and a Bowl: (Optional, for an ice bath) Essential if you want to stop the cooking process immediately and maintain maximum crispness and vibrant color.
Equipment Checklist:
- Large Pot: Big enough to comfortably hold your green beans and a generous amount of water.
- Colander or Strainer: For quick and efficient draining.
- Tongs or Slotted Spoon: For safely adding and removing beans from boiling water.
Step-by-Step Guide: How to Boil Green Beans Perfectly
Follow these steps to achieve perfectly cooked green beans every time, whether you're aiming for a side dish or preparing them for another recipe.
1. Prepare Your Green Beans
- For Fresh Green Beans: Rinse them thoroughly under cold running water to remove any dirt or debris. Next, snap or cut off the tough, stem ends. You can leave the beans whole for a rustic look or cut them into smaller, uniform pieces (e.g., 1-inch lengths) for quicker and more even cooking.
- For Frozen Green Beans: Simply remove them from the bag. No need to rinse or trim; they're ready to go straight into the pot!
2. Bring Water to a Rolling Boil
Fill your large pot with a generous amount of water. The key here is to use enough water to fully submerge the green beans. Using plenty of water helps maintain a consistent temperature and prevents the beans from steaming rather than boiling, which can lead to uneven cooking. Place the pot on the stove over high heat and cover it with a lid. Covering the pot helps the water reach a rolling boil more quickly, saving you time and energy.
3. Season the Water (Don't Skip This!)
Once the water is at a vigorous, rolling boil, it's time to add salt. We recommend adding about 1-2 teaspoons of salt for a standard pot of water, adjusting to your preference. While optional, salting the water is a secret weapon: it not only enhances the natural flavor of the green beans but also plays a crucial role in helping them retain their beautiful vibrant green color. Think of it as seasoning from the inside out.
4. Add the Green Beans to the Pot
Carefully add your prepared green beans into the boiling, salted water. Use tongs or a slotted spoon to gently submerge them, ensuring they are all fully covered by the water. The temperature of the water will dip slightly, but it should return to a boil quickly.
5. Boil Uncovered & Monitor Cook Time
Let the green beans boil uncovered. This is important as covering them during boiling can trap steam and lead to overcooking or a duller color. The cooking time will vary slightly depending on whether your beans are fresh or frozen, and your desired level of tenderness:
- Fresh Green Beans: Typically take between 4 to 6 minutes to become tender-crisp. You're looking for an "al dente" texture – tender enough to bite through easily but still with a slight snap. For deeper dive on achieving this perfect texture, check out Perfectly Boiled Green Beans: Secrets for Vibrant Color & Texture.
- Frozen Green Beans: May require slightly longer, usually about 5 to 7 minutes. They're often par-cooked before freezing, so they don't need excessive boiling.
6. Test for Doneness
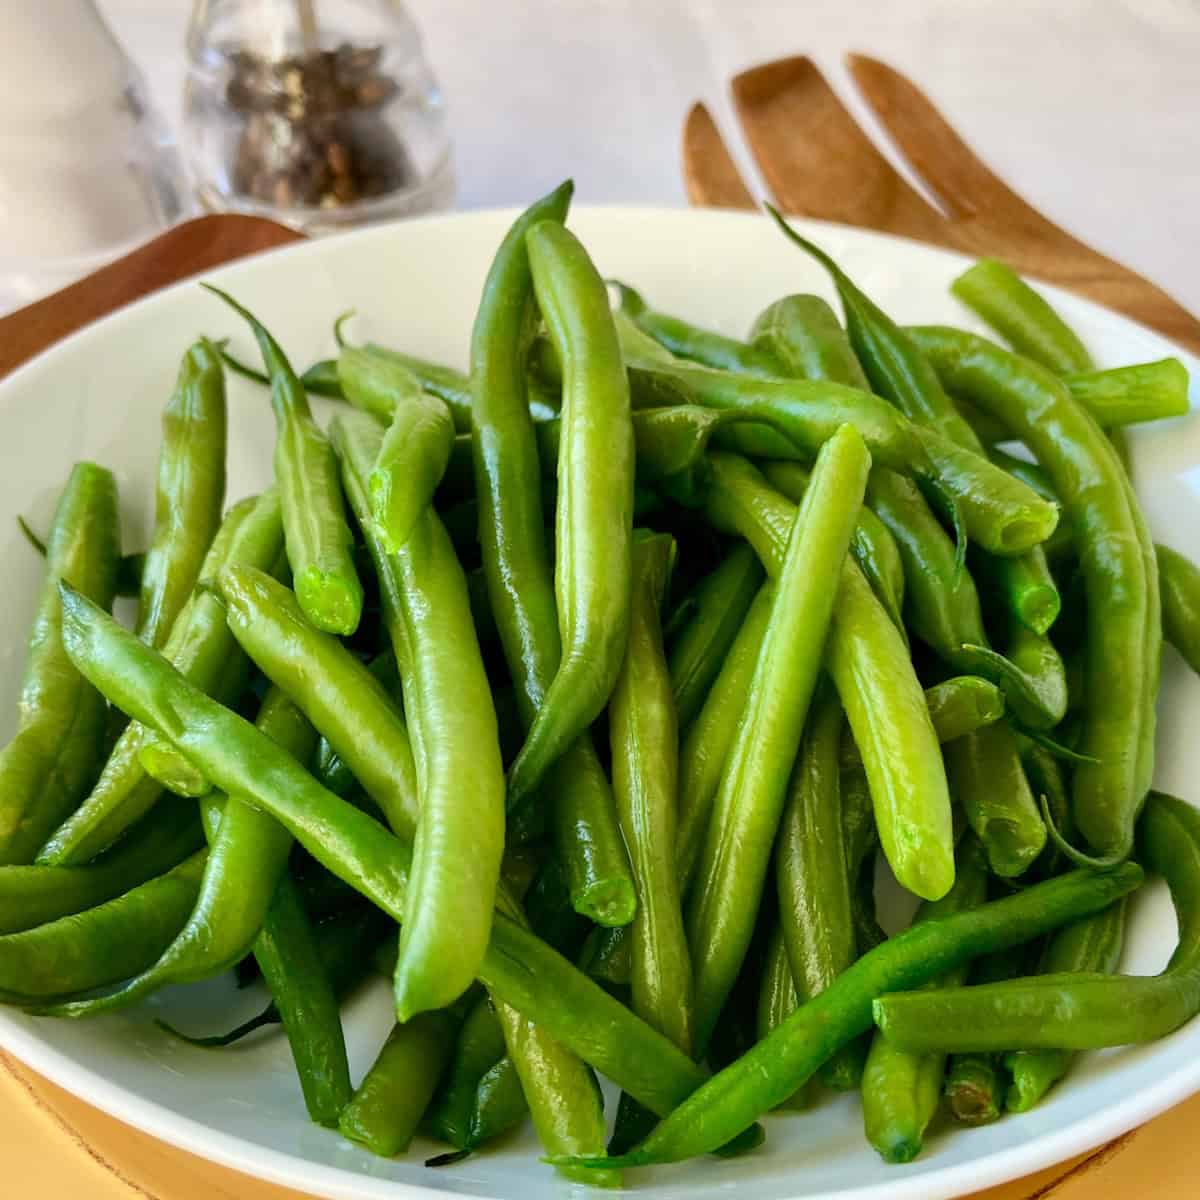
The best way to determine if your green beans are ready is to test them. Carefully remove one bean with tongs and either insert a fork into it or, once cooled slightly, taste it. It should be tender, never mushy, with a pleasant bite and its characteristic green color.
7. Drain Immediately
As soon as the green beans reach your desired doneness, remove them from the heat and immediately drain them using a colander or strainer. Speed is key here to prevent residual heat from continuing the cooking process.
8. The Optional (But Highly Recommended) Ice Bath
For the crispiest texture and the most vibrant green color, plunge the drained hot green beans into a bowl filled with ice water for 2-3 minutes. This process, known as blanching and shocking, halts the cooking instantly, preserving their bright hue and crisp bite. After the ice bath, drain them thoroughly again. This step is particularly beneficial if you're not serving the beans right away or if you plan to use them in cold dishes like salads.
Expert Tips & Common Pitfalls to Avoid
Achieving perfectly boiled green beans is simple when you know the tricks and common errors to sidestep. Here are some insights to ensure your green beans are always a showstopper.
Tips for Perfection:
- Use Ample Water: Don't skimp on water. A large volume helps the water temperature recover quickly after adding the beans, ensuring even cooking and preventing the dreaded "steamed" texture.
- Always Salt the Water: As mentioned, this is non-negotiable for flavor enhancement and color preservation. It's the foundation of well-seasoned green beans.
- Prioritize "Al Dente": The golden rule for boiling green beans is to avoid overcooking. Overcooked beans turn mushy, dull, and lose their vibrant charm. Aim for tender-crisp – a slight resistance when bitten, but no raw crunch.
- Embrace the Ice Bath: If presentation and texture are paramount, make the ice bath your friend. It's the secret to those intensely green, perfectly crisp beans you see in restaurants.
- Consistent Cuts: If you choose to cut your fresh green beans, try to make them all similar lengths. This ensures they cook evenly at the same rate.
- Flavor After Boiling: While salting the water is key, add other flavorings *after* the beans are cooked. A pat of butter, a drizzle of olive oil, minced garlic, a squeeze of lemon juice, fresh herbs like dill or parsley, or a sprinkle of toasted almonds can transform simple boiled green beans into a gourmet side.
Common Mistakes to Sidestep:
- Using Too Little Water: This is a common error that leads to unevenly cooked beans that might be partially steamed rather than boiled, resulting in an inconsistent texture.
- Forgetting to Salt the Water: Unsalted beans often taste bland and can lose some of their vibrant color during cooking. Seasoning the water is fundamental to their flavor.
- Overcooking: This is the ultimate enemy of green beans. Not only do they become mushy and unappetizing, but they also lose valuable nutrients. Always set a timer and test for doneness. If you want to master cooking times, especially for fresh vs. frozen, you might find more specific advice in our guide: Boil Green Beans Fast: Fresh vs. Frozen, No More Mushy Results.
- Skipping the Ice Bath (When Desired): If you want truly crisp, bright green beans and aren't serving them immediately, skipping the ice bath allows residual heat to continue cooking them, leading to a softer texture and duller color.
- Confusing Fresh and Frozen Cooking Times: While similar, frozen green beans may need an extra minute or two compared to fresh ones. Don't assume they'll cook in exactly the same amount of time.
Conclusion
Boiling green beans to perfection is a simple yet incredibly rewarding culinary skill. By following this ultimate guide, you now possess all the knowledge needed to consistently produce crisp, tender, and beautifully vibrant green beans every time. Remember the key principles: use plenty of salted water, don't overcook, and consider the transformative power of an ice bath. With these techniques in your arsenal, you're ready to elevate this humble vegetable into a delightful and nutritious addition to any meal. Enjoy your perfectly boiled, brilliantly green veggies!
